
◷ Reading Time: 8 minutes
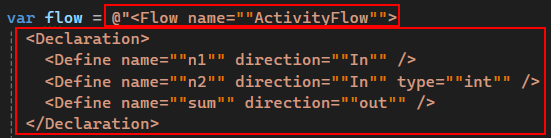
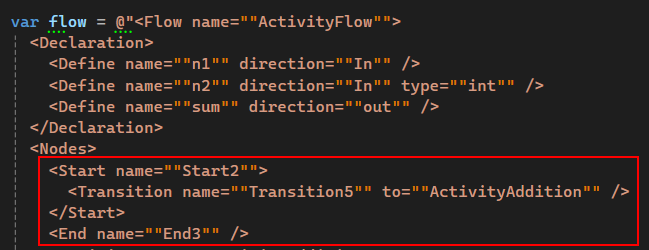
Start and End are required in creating a project, without it will not run. Setting the transitions identifies the flow of your activities.
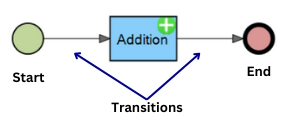
The Activity node contains the Handler and your Active Element. Handler is where you specify the assembly and its node type.

CalculatorAdd is the AdditionActiveElement we created. The attributes (ex: firstNumber, firstNumberType, etc.) are the parameters we declared in the class.

Integrating with FRD
1. Create a nuspec file (FlexRule.Extensions.Calculator.nuspec).

<?xml version="1.0" encoding="utf-8"?>
<package xmlns="http://schemas.microsoft.com/packaging/2011/08/nuspec.xsd">
    <metadata>
        <id>FlexRule.Extensions.Calculator</id>
        <version>10.0.101</version>
        <title>FlexRule.Extensions.Calculator</title>
        <authors>FlexRule</authors>
        <owners>FlexRule</owners>
        <requireLicenseAcceptance>false</requireLicenseAcceptance>
        <licenseUrl>https://www.flexrule.com/legal</licenseUrl>
        <projectUrl>https://resource.flexrule.com/article-categories/create-custom-extensions</projectUrl>
        <description>Introduces the Calculator Functionality</description>
        <summary>Introduces the Calculator Functionality</summary>
        <releaseNotes></releaseNotes>
        <copyright>(c) FlexRule</copyright>
        <tags>FLEXRULE EXTENSION</tags>
    </metadata>
    <files>
        <file src="bin\Debug\net8.0\FlexRule.Extensions.Calculator.dll"
              target="bin\FlexRule.Extensions.Calculator.dll"/>
        <file src="Extension.xml" target="Extension.xml"/>
        <file src="Icons\**" target="Icons"/>
    </files>
</package>2. Create Extension.xml file
Extension.xml
<Extension>
	<CustomToolbox>
		<File name="Toolbox.Calculator.xml">   <Add name="Calculator" toolbox="Calculator"
				documents="Flow" visible="true">
				<Item name="BasicMath" displayName="BasicMath" separator="true" />
				<Item name="CalculatorAdd" wikiId="calculator/#addition" displayName="Addition"
					iconToolbox="~\Icons\add.png" iconActivity="~\Icons\add.png">
					<Template command="Activity, NodeHandler">
						<Parameters description="Please enter details for Calculator Addition below">
							<Section title="Settings">
								<Add name="firstNumber" label="First Number"
									description="Enter First Number" field="TextBox" defaultValue="" />
								<Add name="secondNumber" label="Second Number"
									description="Enter Second Number" field="TextBox"
									defaultValue="" />
								<Add name="return" label="Copy Sum To"
									description="Target parameter to hold the Sum result"
									field="TextBox" />
							</Section>
						</Parameters>
						<Properties>
							<Add name="firstNumber" displayName="First Number"
								description="First Number to add" linkToParameter="true" />
							<Add name="firstNumberType" attribute="firstNumberType"
								displayName="Text Value" visible="false" typeOf="firstNumber"
								type="string" nullable="true" defaultValue="string"
								options="Numeric,String,FormattedString,Expression"
								description="Value type be used on evaluating value of First Number" />
							<Add name="secondNumber" displayName="Second Number"
								description="Second Number to add" linkToParameter="true" />
							<Add name="secondNumberType" attribute="secondNumberType"
								displayName="Text Value" visible="false" typeOf="secondNumber"
								type="string" nullable="true" defaultValue="string"
								options="Numeric,String,FormattedString,Expression"
								description="Value type be used on evaluating value of Second Number" />
							<Add name="return" displayName="Copy Sum To"
								description="Name of the parameter that holds the Sum result"
								linkToParameter="true" />
						</Properties>
						<Activity name="ActivityAddition">
							<Handler assembly="FlexRule.Extensions.Calculator.dll"
								type="FlexRule.Extensions.Calculator.Flows.Nodes.CalculateNodeAdapter" />
							<CalculatorAdd firstNumber="#firstNumber#" secondNumber="#secondNumber#"
								return="#return#" />
						</Activity>
					</Template>
					<References>
						<Model>
							<Declaration>
								<Define name="#return#" direction="local" />
							</Declaration>
						</Model>
					</References>
				</Item>
			</Add>
		</File>
	</CustomToolbox>
</Extension>
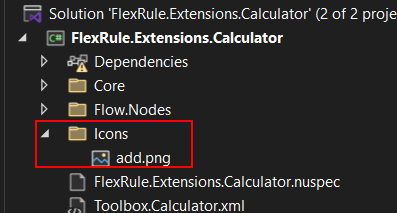
3. Create an Icons Folder and add this image : 
4. Download nuget.exe (Windows x86 Commandline) https://www.nuget.org/downloads and save to C:\Windows
5. On your Visual Studio, build your project in Release. Then in the Package Manage Console go to the directory of FlexRule.Extension.Calculator and enter this command: nuget pack FlexRule.Extensions.Calculator.nuspec

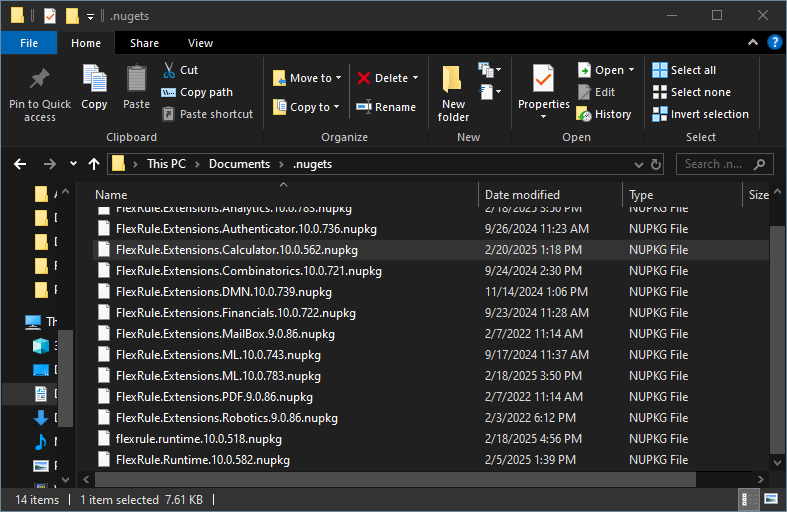
6. Paste the NuGet package to your \Documents\.nugets folder
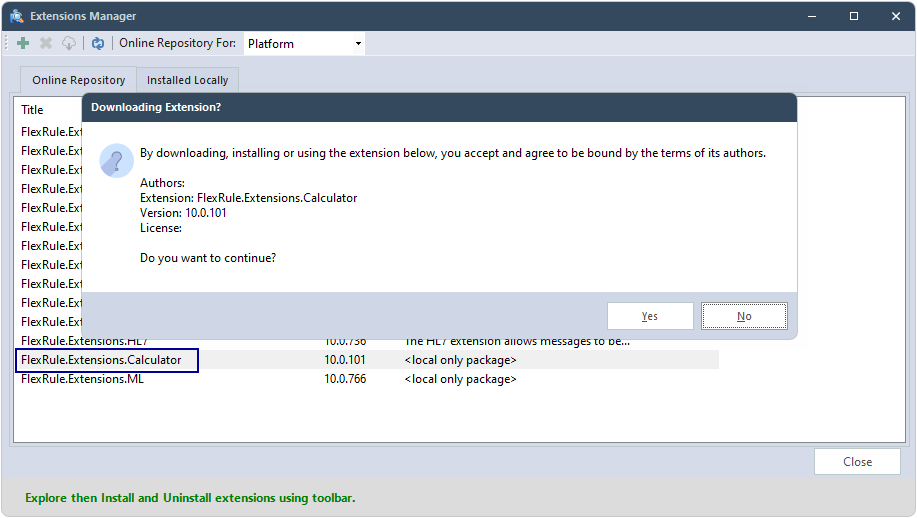
7. Open FlexRule Designer, create a project and install your extension (Tools > Extensions Manager).
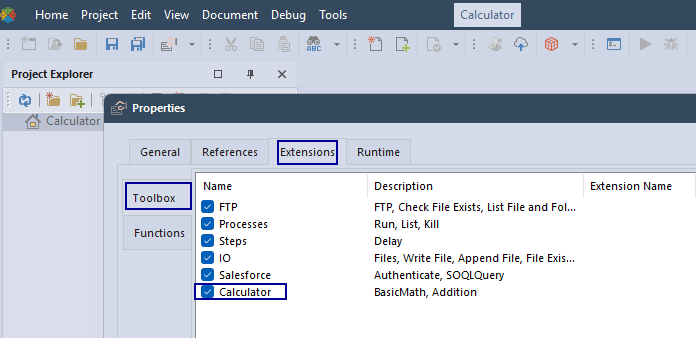
8. Enable the extension (Project > Properties > Extensions > Toolbox)
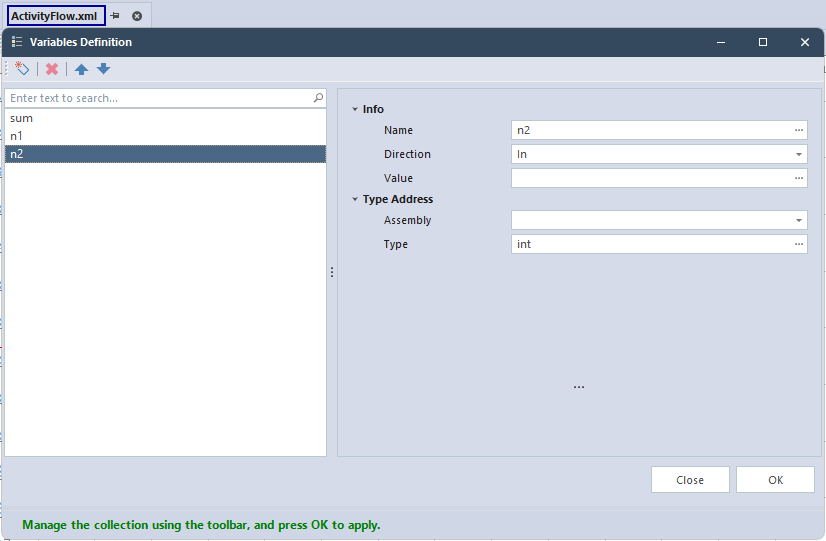
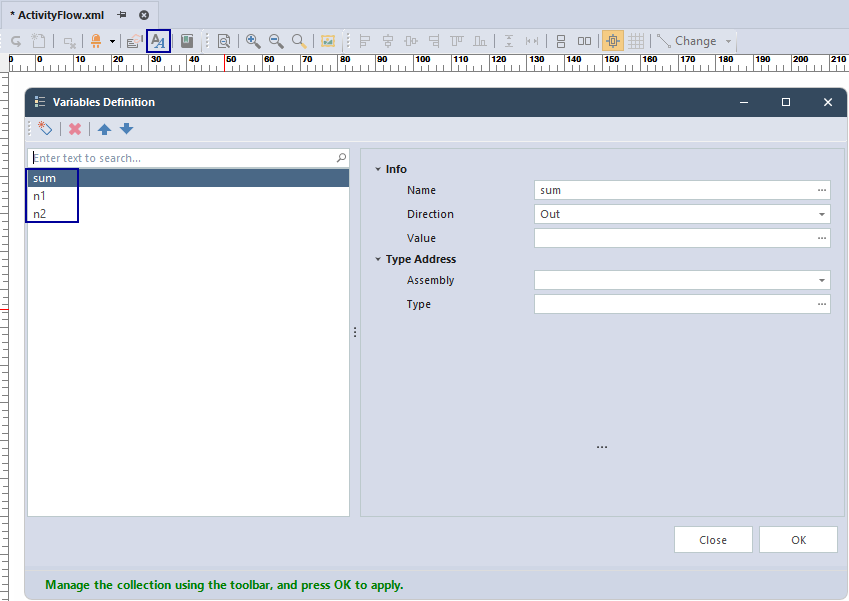
9. Click on Variable Parameters and add the below parameters:
- sum (Direction: Out)
- n1 (Direction: In)
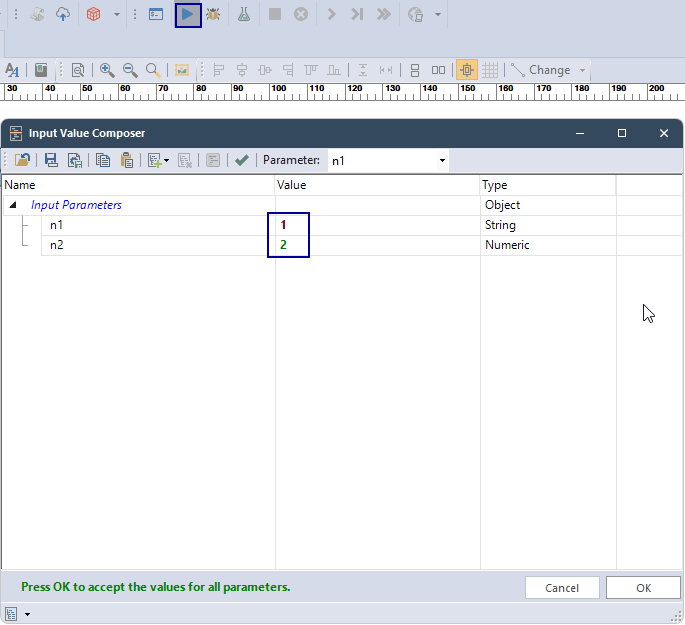
- n2 (Direction: In, Type: int)
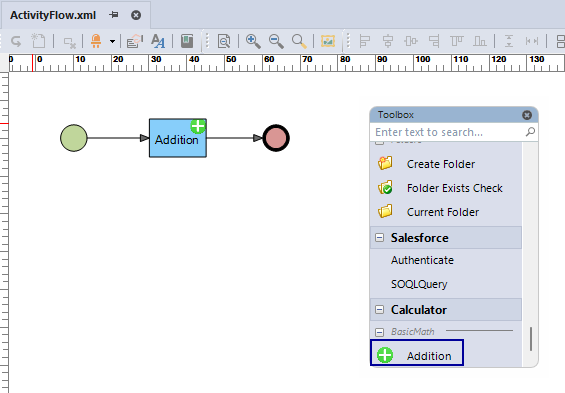
10. Create the flow for your project, then drag and drop the Addition on it.
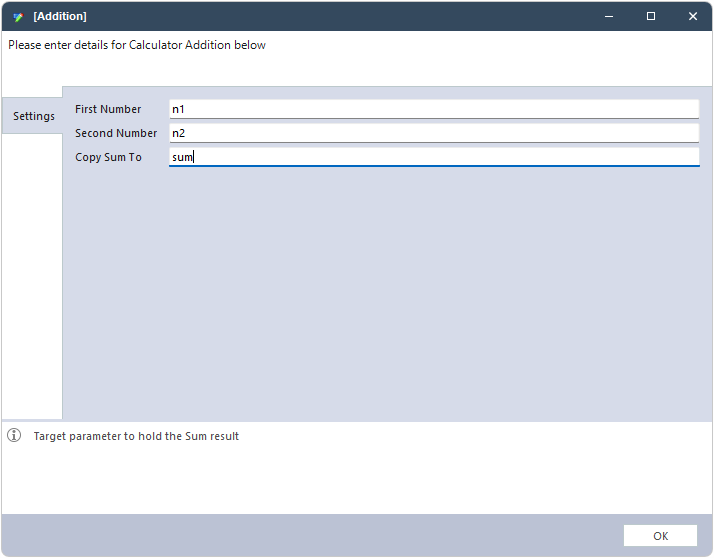
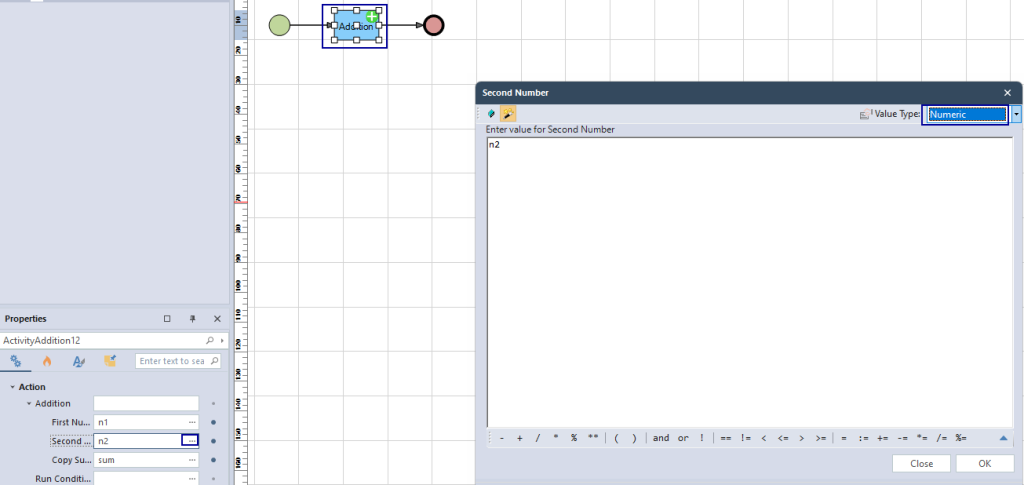
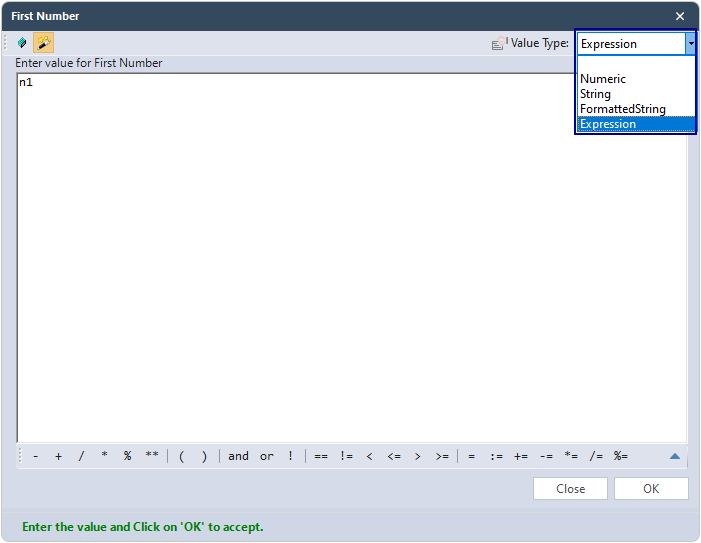
11. Click on Addition, on the Properties section click on 3dots for First Number, then change the Value Type to Expression.
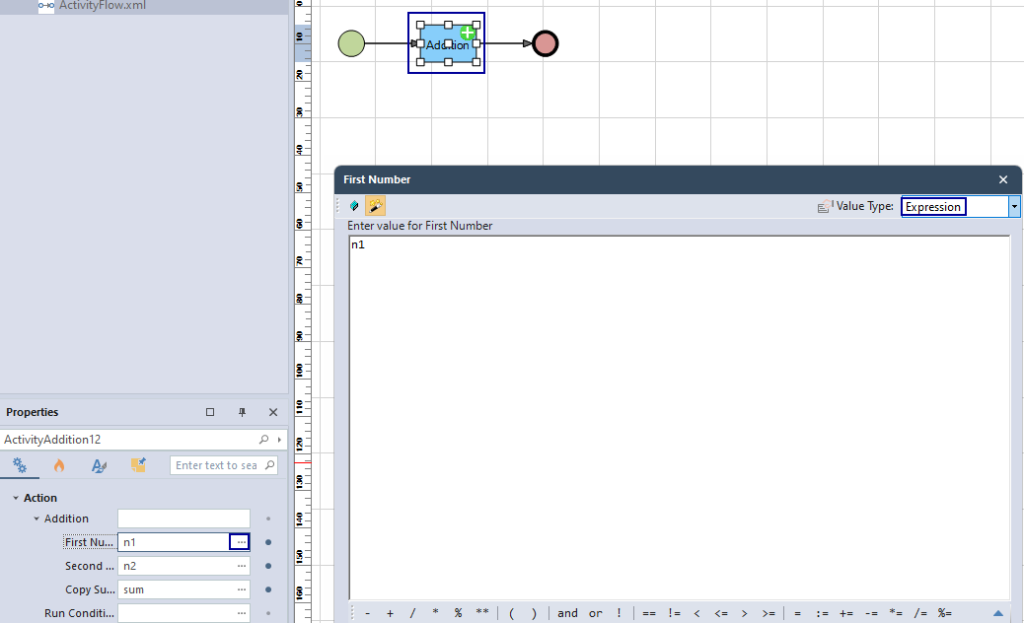
12. Do the previous step for Second Number and change that one to Numeric
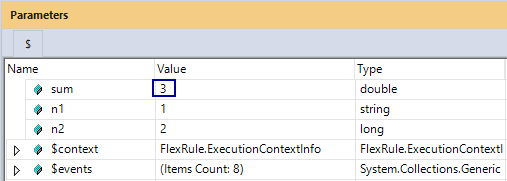
11. Run or Debug and inspect the result on Parameters window.
Toolbox XML
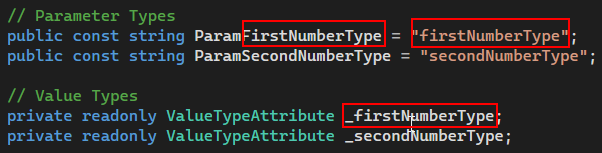

Review the step 9 to realize how we create the variables for it and also on steps 11, and 12 assign values for the Addition.
The Value Type, comes from the linkToParameter and options.

Debugging
When you install an extension, it will copy all the files you declared in your nuspec file to the project’s bin folder.

Thus, it is possible to attach the Designer’s process to your Visual Studio. On Visual studio attach (CTRL+ ALT + P) the process to Flexrule.Designer.exe
