
◷ Reading Time: 5 minutes
This tutorial guides you through a basic example of a Decision Table and Decision Requirement Diagram(DRD)for the age classification decision. This example also provides a basic understanding of how to create a simple decision table according to DMN standards and how to add that Decision Table to a DRD as a decision node with input values. We also walk you through how to validate, debug, and run the model.
This example shows how to handle a single numeric input value and derive a string output.
Let’s say we need to have a classification based on age. In this case, age is considered an input(Condition), and Age Classification is an output(Action).
Create a Project
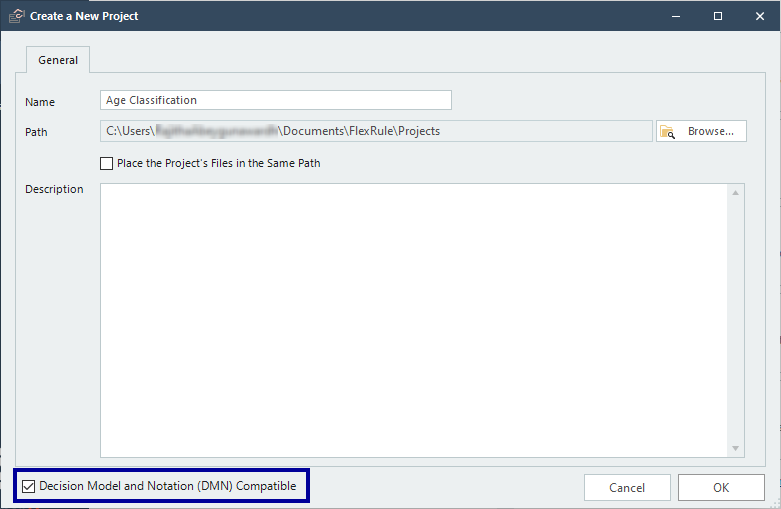
Open the FlexRule Designer and create a new project.

You can give the project a name and make sure you tick the “DMN Compatible” check box at the bottom left corner.
Create a Decision Table
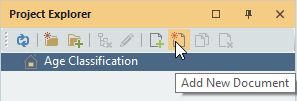
Then, create a Decision Table by clicking “Add New Document.”
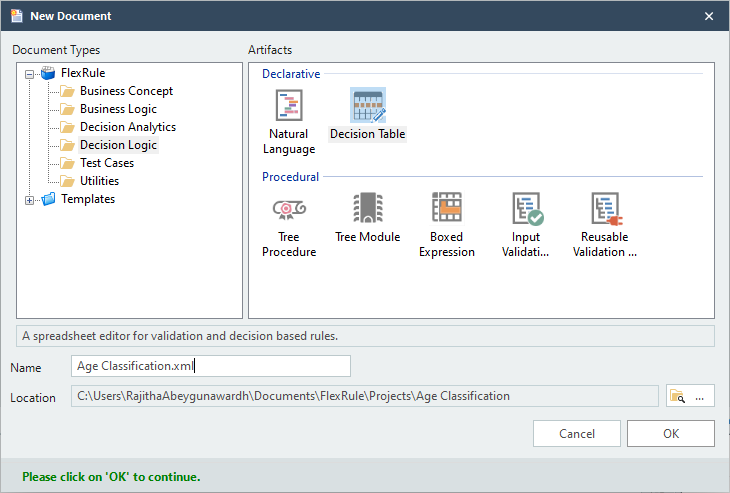
Then, you can follow the steps in this article to complete the rest of the steps for creating a Decision Table by adding rules.

Introduce FEEL
FEEL defines expressions for checking the conditions against the input and set the actions using output values. In this scenario we’ll use one input parameter called “Age” for checking the Age condition and output parameter called “AgeClassification” for setting the output values in the action.
You can simply define variable parameters by clicking on the following icon.
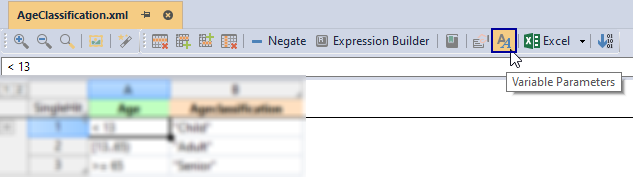
Then you can define those 2 parameters by selecting the direction and type.
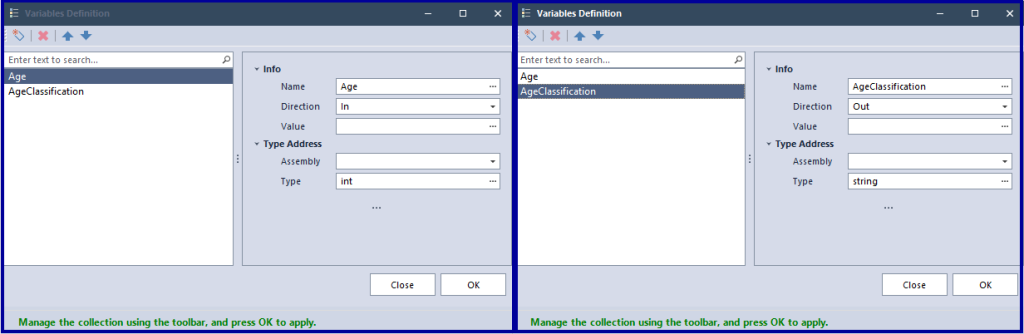
Then you can use those parameters in the expression.
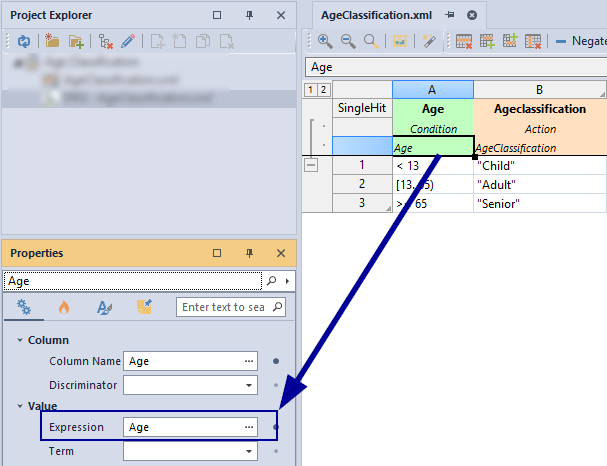
Now you have created the complete Decision Table and you can execute this Decision Table as well. Now, lets go one step ahead and introduce a Decision Requirement Diagram(DRD) and use this Decision Table inside the DRD.
Introduce Decision Requirements Diagram
DRD is useful to compose and analyse multiple sub decision nodes alongside with inputs and relationships between those decision nodes according to the DMN standards.
You can visit this page to read more about DRD and its symbols to have a better understanding.
Lets introduce the Decision Table created above as a decision node into a DRD with input data. You can create a new DRD using new document -> Business Logic -> Decision Graph

Then, you can simply:
- Drag and drop the Decision Table into the DRD as a decision node
- Drag and drop the Input Data node from Toolbox, set the Input Data name, and set the type for it in the Properties window. This should be the same name as we defiened as an input parameter in the Decision Table.
- create a relationship between those 2 nodes from Input Data to Age Classification decision node.

One last thing you need to do is create a variable parameter in the DRD to hold the output value which returns from the Decision Table. The direction should be out.

Then you can use this variable in the decision node(Age Classification) “Copy Value To” to hold the return value from the Decision Table.

Now you have successfully created the DRD and its ready to execute.
Run/Debug Decision Requirements Diagram
You can simply navigate to toolbar on the top and click Run or Debug the DRD.
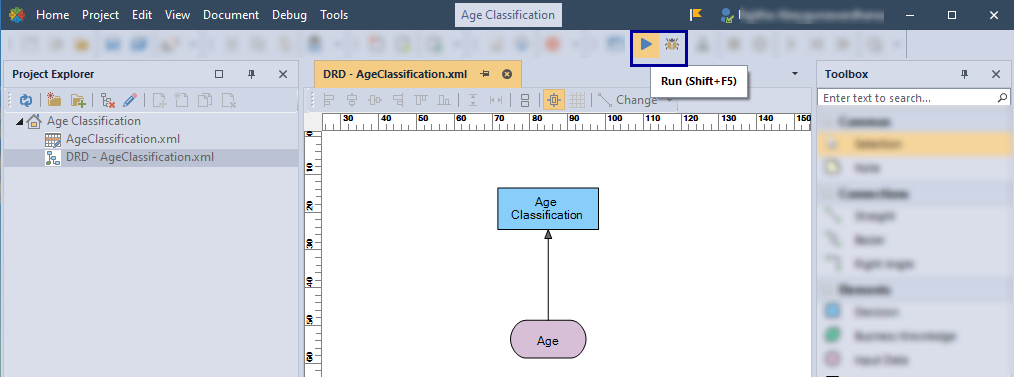
You can use Data Composer or JSON Composer to input values.
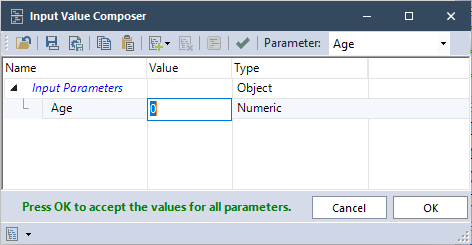
Once you Run/Debug, you can see the output in the Parameters window.

Doanload the Sample Project
Use the attachment at the end of the page to download the sample project.