◷ Reading Time: 7 minutes
Every FlexRule logic document has a semantic view, a single consistent model of the concepts, decisions, and relationships behind an artifact, shown in a new Semantic Browser tool window, separate from each editor’s authoring canvas.
Instead of clicking through node by node, you can expand the tree, read what each part contains, search it, and jump straight to the logic behind it. The view shows real model detail, not just the shape of the document. For example, you can see the constraints on the properties of a fact concept, and the metadata on the nodes and transitions of an activity flow. You can also load several documents into the same panel.
Documents it supports
The Semantic Browser can show these types of document:
- Fact Concepts
- Decision Knowledge
- Decision Tables and business glossaries
- Activity flows and workflows
- Natural-language documents
- Validation documents
- Procedure and module documents
- Continuous Decision Models (CDM)
- Decision Requirements Diagrams (DRD)
This article uses a Decision Requirements Diagram as its main example.
When is it useful?
- You want a quick outline of a large diagram: every node, its label, its linked logic and what it feeds into.
- You are looking for something, such as a formula, a field or a node, and you don’t know where it lives.
- You want to follow the sequence of decisions without hunting for arrows on the canvas.
- You want to see the fact concepts next to your logic.
Send a document to the Semantic Browser
- Open the logic document you want to explore.
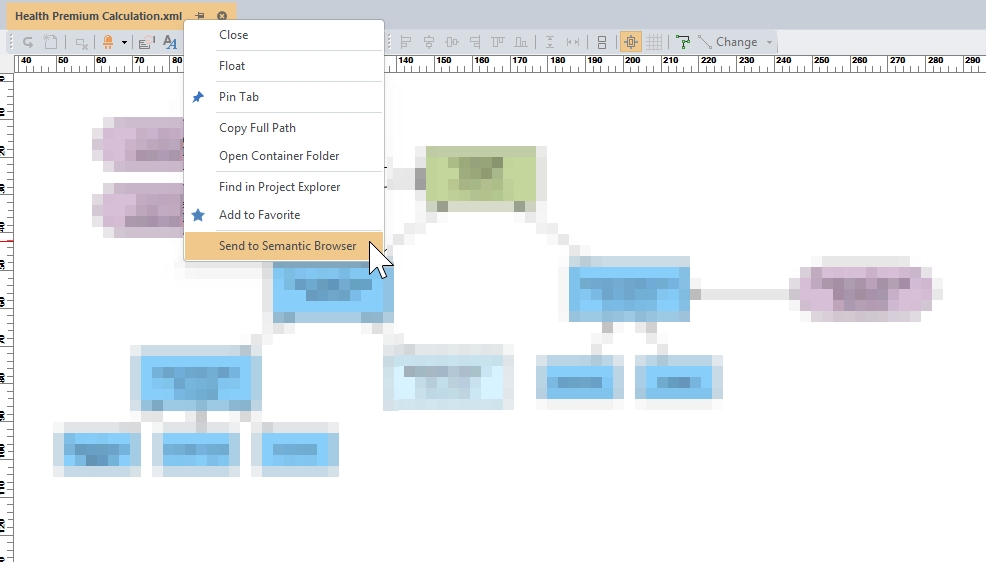
- Right-click the document’s tab at the top of the editor.
- Choose Send to Semantic Browser.
The Semantic Browser opens on the right-hand side of the Designer with your document loaded.
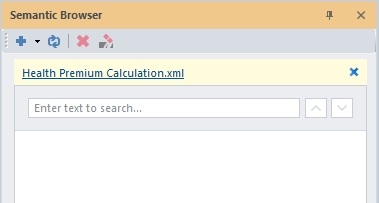
Another way. If the panel is empty, a yellow banner appears with the name of the document you are working on. Click the name and it is added to the tree.
Note: Documents you send are added to the tree. Use the toolbar to remove entries you no longer need.
What you will see in the tree
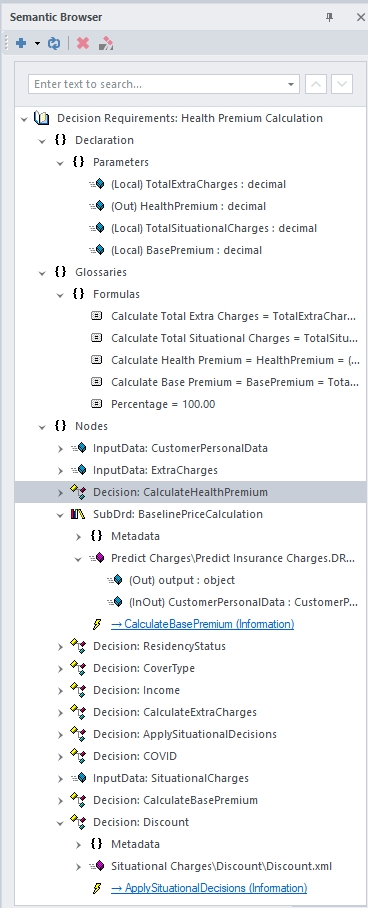
A decision requirements diagram appears as a root with three groups under it:
| Group | What it contains |
|---|---|
| Declaration | The parameters (variables) declared for the document. |
| Glossaries | The formulas from the glossaries the document uses, for example Calculate Base Premium = BasePremium… |
| Nodes | Every node in the diagram, listed by type and name: InputData, Decision and SubDrd (sub-decision). |
Expand a node to see more detail. When you click on each node, the relevant node will be pointed out.
Things you can do
Follow the chain of decisions
Click a link such as “→ Calculate Base Premium (Information)” and the tree jumps to that node. It is a quick way to walk from the bottom of a diagram to the top.
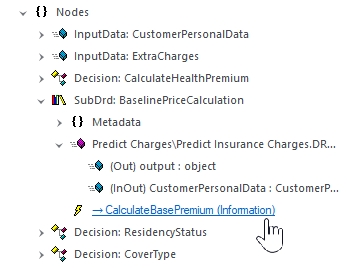
When you select an item, the matching node is selected on the diagram and its details show in the Properties panel.
Open the logic behind a node
Hover over a node item and click Open. For a node with linked logic, such as a decision table, the document opens in the editor and is added to the Semantic Browser as its own root. This lets you drill from the high-level diagram down into the rules without leaving the panel.
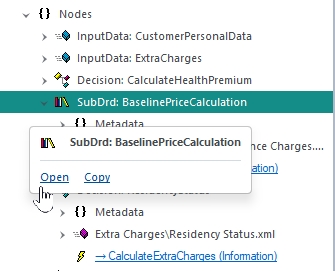
Search
Type in the search box and press Enter. The tree expands to show every match and highlights it. A counter such as 1/10 tells you how many matches there are, and the up and down arrows move between them. The search covers names, labels, formulas and linked documents. Your previous searches are kept in the dropdown.
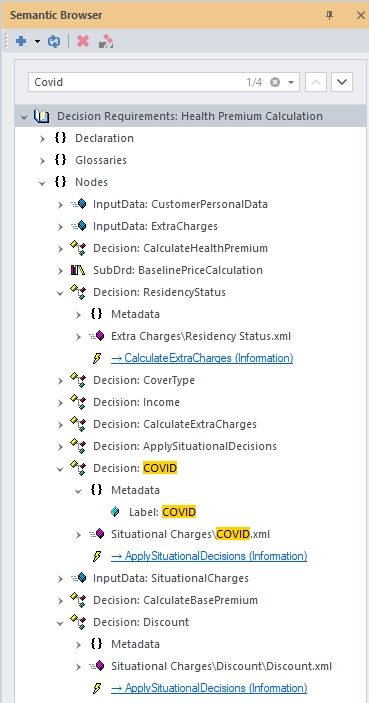
Adding other sources
The Semantic Browser is not limited to your logic documents. The Add New button on the toolbar lets you bring in more information and see it in the same tree.
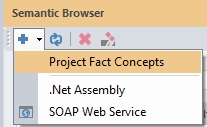
| Source | What it adds |
| Project Fact Concepts | All the fact concepts in the project, with their scopes and fields |
| .Net Assembly | The contents of a .NET assembly you choose. |
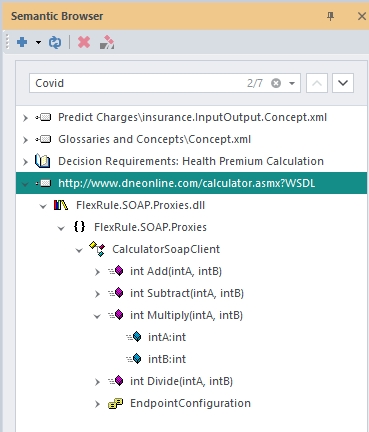
| SOAP Web Service | The operations of a SOAP web service, based on its WSDL. |
Adding a SOAP web service
- Click the arrow next to Add New and choose SOAP Web Service.
- In the SOAP Client Proxy Generator, enter the address of the service in WSDL Address. It must start with http:// or https://.
- Leave the Name as it is, or change it. The default is FlexRule.SOAP.Proxies.
- Click Discover.
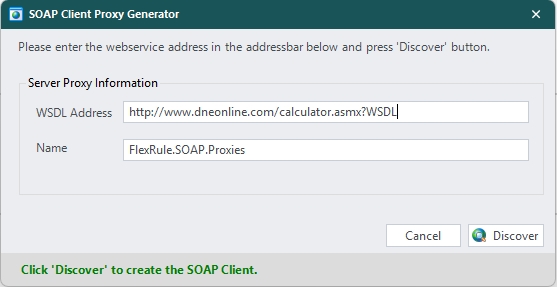
When discovery finishes, the service appears in the tree.